Skid Steer Leveling Attachments: Floating Leveling Blade – ABI Dirt
ABI Products Shown In This Video
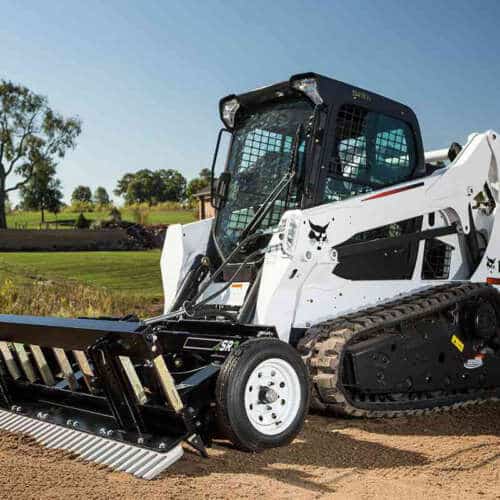
SR3 Grading Rake
- Starting At: $218/mo.*
- For Skid-Steer Loaders (SSL) & Compact Track Loaders (CTL)
- 7.5' Width - Commercial-Duty
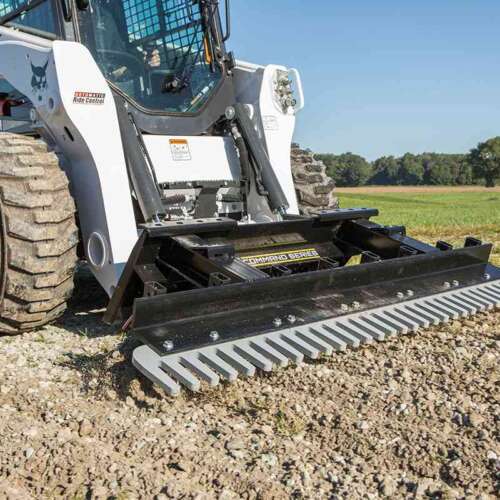
SR1 Grading Rake
- Starting At: $82/mo.*
- For Skid-Steer Loaders (SSL)
- 6.5' Width - Commercial-Duty
Transcription
Hi everyone, Matt Metzger here with ABI Attachments.
Welcome back to another episode of the ABI Dirt. We are into week three of our mini-series on comparing the SR1 and the SR3. Last week we did a crash course on the float position of your skid-steer or a track loader and how that plays into the operation of the SR3 and SR1, given that the SR3 has got some stabilizing wheels for you.
This week, we are taking a look at one of the most unique components to our complete portfolio, our lineup of grading rakes and landscape rakes. And that is our floating leveling blade. Now those of you who’ve been with us for a couple of months now, you might remember that episode we did on the floating leveling blade on the TR 3 a couple of months back, but we’ve actually modified that floating leveling blade just a bit on the SR3, because those of you digging through in landscape and commercial contact or kind of applications probably got some debris you’re working with. And we’ve modified that leveling blade to help you out. So let’s go take a closer look.
So here we are with our SR1 and our SR3. And just like last week, we are going to start out with the easy one and talk about the leveling blade on the SR1.
As you can see, there is no floating leveling blade. Remember that we have designed the SR1 to work on your smaller skid loaders and track loaders. So in order to keep the frame smaller in order to take the weight out of the tool and to maximize your visibility from cab down to soil level, we do not have a floating leveling blade on the SR1, but that doesn’t mean you can’t level your surface. Remember for those of you who are born in the seat of a skid-steer or track loader, you are pretty crafty when it comes to being able to use any component, even as simple bucket to level out the surface that you’re working with. So, don’t doubt the power of this front finished rake that we’ll cover more detail in future episodes, to level the surface of your contour. You’re just going to have to be more intentional about it.
You already know how to get up close to where you want to be. Remember with the SR1, you can get right up close to concrete pads and sidewalks and landscaping. You’ve got some really precise maneuverability here, so you can get right up close to where you want to go. And then slowly back your way out and you are in complete control of the leveling function at that point.
Here we are with our SR3 and right in the heart of this monster is this floating leveling blade. When we say that the SR3 can level and loosen and finish this couple-hundred pound, three quarter inch thick piece of steel, with these bolted on a hinge plates, it’s this big leveling blade that’s doing that leveling work for you. You can see that it is pivoted here. It’s bolted into the main frame, up at the front of the frame at four different spots, scoops down to your soil engaging component, and then comes on back in a fully welded piece to these arms in the back, that provide you the control for pinning it down or putting it up.
And I’ll get to all those details in a second. A lot of you are using tools and you’re accustomed to using tools that have a de-compaction component, that ripping component before your leveling component. Think Your land planes and your box blades, right? You’ve got those big J shanks, those big spades at the front to rip everything up. And then you’ve got the leveling component in the back. But here’s what we found when it comes to preparing the soil for a finish, especially in situations where you’re working with seed beds. Anytime you’ve got a leveling component that is carrying material, it means you’ve got the weight of that component, possibly the weight of the tool itself and the weight of the soil you’re carrying, all on that leveling component. So if you’re using, let’s say a traditional box blade, and you’ve got your rippers upfront and you’re de-compacting everything, but then you’re pulling this massive box of material in the back, you’re actually re-compacting everything you’ve just loosened.
But since you were preparing that, if you’re preparing that soil for a seed bed, or if you’re working on gravel drive where you want to keep a little bit of looseness on that gravel for the finish, you actually want some vertical agitations, some rippers behind the leveling component. So that’s why we choose to put our leveling component first, then your vertical agitation, then a finished rake that applies just the right amount of pressure, so you can recompress after you’ve ripped.
So you can see because we’re pivoted upfront behind the front angle bracket of this frame, you can see that we’ve got these arms sticking back here. These will actually float up and down as your carrying material material pushes against that front face, these arms go up and you can hear that bang. So the entire time you’re using this tool, that material is pushing against the front face, the level leg comes up, it’s going to go bang, bang, bang, on top of these pins, it’s designed that way. I’ll tell you why in a second. And as you come to low spots and the material you’re pulling scoops back down into the low spot, so your [inaudible 00:04:53] , the weight of that blade pulls that material back down. That’s why we call it a floating leveling blade because it grabs the highs pushes back. And as you come to the lows, the level blade scoops back down again. So that as you are operating at the ideal angle, remember last week, you’re operating in float position on your skid-steer track loader, as you’re operating at the ideal angle, you don’t have to be so consciously working hard to level out that surface, that floating leveling blade is doing the work for you.
That is the leveling blade on the SR3, but we’ve got a couple of other tricks up our sleeve.
First step you can see here in the back, kind of these towers with a multihull position with the pin that we’ve got up and out of the way. This pin allows you to pin down or pin up this level blade. So if you’re in a situation where you say Matt, I don’t need to level anything out, I just want to rip the daylights out of the soil. No problem. You take this pin out, pull your level, blade up, slip the pin underneath. And now you’ve got this level blade pinned up all the way out of the way, and you can bury those scar fires as deep as you want. And you can just really rip and mix things up. That pulls your level blade out of play.
Second use of these towers and holes out back is that you can actually pin this blade down so it can’t come up at all. Now you’ve effectually got a mini box blade underneath your SR3, and you can pull as much material as you want, because that level blade isn’t going to float up at all. So either pin it up, pin it down or let it float to get that nice, even finish.
Trick number two, you’ll notice rather than just a flat blade or a solid blade across, we’ve got bolted to that blade, some, what we call hinged rock teeth. As you are operating this SR3 in reverse pulling your material, remember, leveling out that contour of your surface. If you’re doing some seed bed prep, you probably also have some debris, right? Rocks, branches, stumps that are getting in your way. All of that debris will be grabbed by those rock teeth. We’ve got, you can see this, this massive tooth edge here. As you pull that debris back, you can leave the debris pile like we talked about last week, because you’re in float position, you don’t need to disengage float position, you just hit at the SR up. Well, that means that level blade is still hanging down low by your surface. No problem, because since these rock teeth are hinged, as you move forward to grab your next pile of debris or grab your next portion of your surface to level it out, these hinged rockteeth will just swing up out of the way, so they’re not redistributing that debris that you just pulled up so effectively. So that’s the glory of these hinged rockteeth. They’re there when you need them, grab your debris, but when you’re moving forward, again, they’ll clear out of the way for you.
That’s all we’ve got today. Everybody on this episode of the ABI dirt, remember if you are working in the dirt, you are working on a surface that will most likely get walked on, stepped on, driven on or looked at, and you want to take those undulations out, not only for the aesthetics, but also for the functionality that you don’t want anyone getting tripped up. But also remember you’re working outside, you got to think about that rainfall, where the water’s going to land. And if you’ve got highs and lows, you’re eventually going to end up with puddles and ravines, and nobody wants that.
So I’m glad we could take a look today at that floating leveling blade and how it can help you get rid of those highs and lows, so you can match your surface with that level contour that you’re trying to work with.
If you want to want any additional info, take a look at the links below, check out the SR3 and S31 on our website. Otherwise I hope you have a great week and I’ll see you next week.
