SR3 Skid Steer Rake: Control Your Rip! – ABI Dirt
ABI Products Shown In This Video
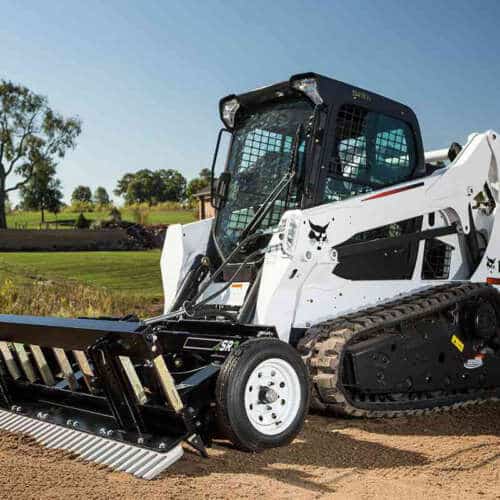
SR3 Grading Rake
- For Skid-Steer Loaders (SSL) & Compact Track Loaders (CTL)
- 7.5' Width - Commercial-Duty
- Starting At: $218/mo.*
Transcript
Hi, everyone. Matt Metzger here with ABI attachments. Welcome back to another episode of ABI Dirt. Today is the second part in a mini series where we’re comparing the SR three and the SR one. We’re taking time to look at these two products over the next couple of weeks, because the seasons, they are a changing. It’s getting cold, a lot of you are trying to sneak in some projects here before the snow flies there in the northern part of the country. And so we want to talk about these products because they’re specifically designed to save you energy, save you time and save you money. So, let’s take a look at these two products today. Specifically in this episode, we are looking at these stabilizing wheels on these two units. Let’s check it out.
All right, here we are with our SR three and our SR one. Since we’re talking about stabilizing wheels today, we’re going to make it really easy and start with our SR one. As you can see, there are no stabilizing wheels on the SR one. So here’s the game on the SR one. We intentionally left out stabilizing wheels because we designed this unit, as you heard last week, it’s about a foot narrower. We wanted to take some weight out of it, take some size out of it so that it can be compatible with some of your smaller skid-steers and track loaders. If you’re using the SR one, it means you’re trying to get into tight spaces, right up next to sidewalks, right up next to concrete pads right up next to landscaping.
The SR one is also ideal in scenarios where you’re trying to get a deep rip and then use something else to finish. So, if you are someone who loves your power rig, and I will never be able to convince you otherwise, take a look at the SR one. You can get down to four inches deep, still get a decent finish, and then still use that power rake if you are so inclined. But we’re going to talk about that later in future episodes when we talk about the scarifiers.
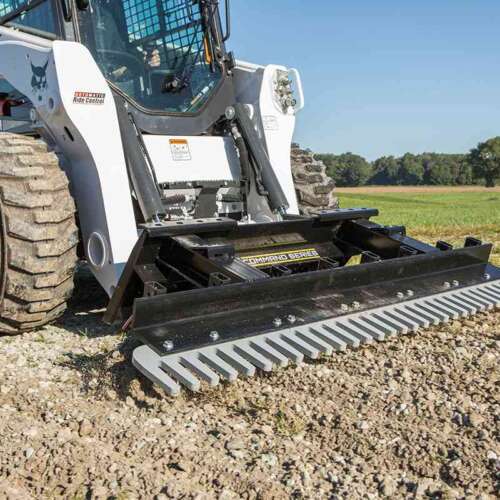
Let’s swing then over to our SR three, where you do see a stabilizing wheel where we don’t have one in the SR one. So as we mentioned last week, the stabilizing wheel here on the SR three, 19 and a half inches wide here, this provides you some control on the SR three.
Before we continue to dive in, I want to touch base with you on float mode on your skid-steer and track loader. If you don’t know what float mode is, this is just an introductory course. If you do know what it is and you hate it, stick with me, all right, there’s a reason why we talk about using the SR three in float mode. By hitting a pedal or hitting a lever you can make it so that those boom arms float so that they aren’t constantly pressing down. It just moves with the motion and the weight and the resistance of the skid-steer. This is ideal if you are trying to allow whatever you’ve got on the front end of that skid-steer to follow the undulations and the contour of your skid-steer. Because remember, if you’re not in float mode as you’re operating in reverse and the tail end, the butt of that skid-steer goes up, whatever you’ve got on the front is going to go down. Or vice versa, right, if the tail end of that skid-steer, as you’re in reverse, goes down, your tool’s going to disengage the ground.
So if you don’t have this in the float mode your front attachment is just rigid, right? That can be advantageous if you’re trying to push heavy amounts of soil or you’re really trying to aggressively shape and contour the ground. But if you’ve got most of your rough work done and what you’re trying to do is have a grading rake on the front end that will follow the contours that you’ve created up embankments away from houses, and you’re just trying to get that last bit of deep compaction and finish work and level out the undulations you’ve got, then you’re going to want to put that skid-steer in float mode. So if you’ve never used that before, consult your owner’s manual, take a look online. I’m sure there’s got to be instructions online for your particular skid-steer or track loader on how to get it into float mode.
We’ll go back to you folks who are concerned about float mode, who don’t like it. Listen, if you were born in a skid-steer, if you’ve been using a skid-steer since you were about knee-high, you probably don’t like float mode because you can feel that skid-steer move. You can tell when your butt’s sinking down or going up and you need to adjust the boom or the arms of your tractor. I get it. It’s totally fine. But for those of you who are still learning or those of you who like that fine finesse of a grading rake that floats a little bit, consider putting this in float mode. And we strongly recommend that for the SR three.
Why all of that before I talk about the stabilizing wheels? The stabilizing wheel is specifically designed to work with float mode so that as you are operating in reverse the stabilizing wheel keeps the SR three at an ideal angle so that the finish rake, scarifying teeth and floating and leveling blade all hit the ground at the ideal angle so that you can follow that contour, level your soil, get the decompaction you want, remember, you can control that with your hydraulic cylinders there on those scarifiers, and you can get that nice even finish. And what’s more, whereas many tools require you to, once you’re backing up in float mode you have to kick out of float mode to go forward and then re-engage float mode. Because of these tires, these actually function kind of like transport wheels. Which sounds silly, because in the skid-steer you should be able to pick up the tool, right?
But when you’re moving forward you can stay in float mode, just pivot the tool up so the finish rake’s in the air. The SR three will ride forward on the stabilizing wheels, not messing up any of the levelness that you’ve just created. And then once you get to your desired point, angle back down, you’re still in float mode and you can grade once more. So that’s why we prefer to use these stabilizing wheels onto the SR three. They also come in handy because there’s some adjustability there that if you want to go, instead of zero to four inches deep on your scarifiers, if you want to get all the way down to seven, you can adjust the whole placement here and that will allow you to get a deeper rip with your scarifiers.
That’s all we’ve got today, everyone. Remember, we have got designated factory reps available to talk with you about these two units. If you’ve got additional questions that I am not answering here, as I’m sure you do, please don’t be afraid, give us a call. That’s why our factory reps are here, to answer your questions, to ask you a couple of questions about what you’re trying to accomplish and how we can pair you up with an attachment that will work best for your needs. So, hit that subscribe button, hit the like button. If you want, leave us some questions in the comments below and we look forward to working with you. Take care.
